A Step by Step Guide to Using Spray Foam Cans for Small Gap Sealing
Introduction: The Magic of the Orange Can In the world of home improvement and DIY maintenance, few tools are as satisfying or as effective as the humble can of spray foam sealant. Whether you are ...
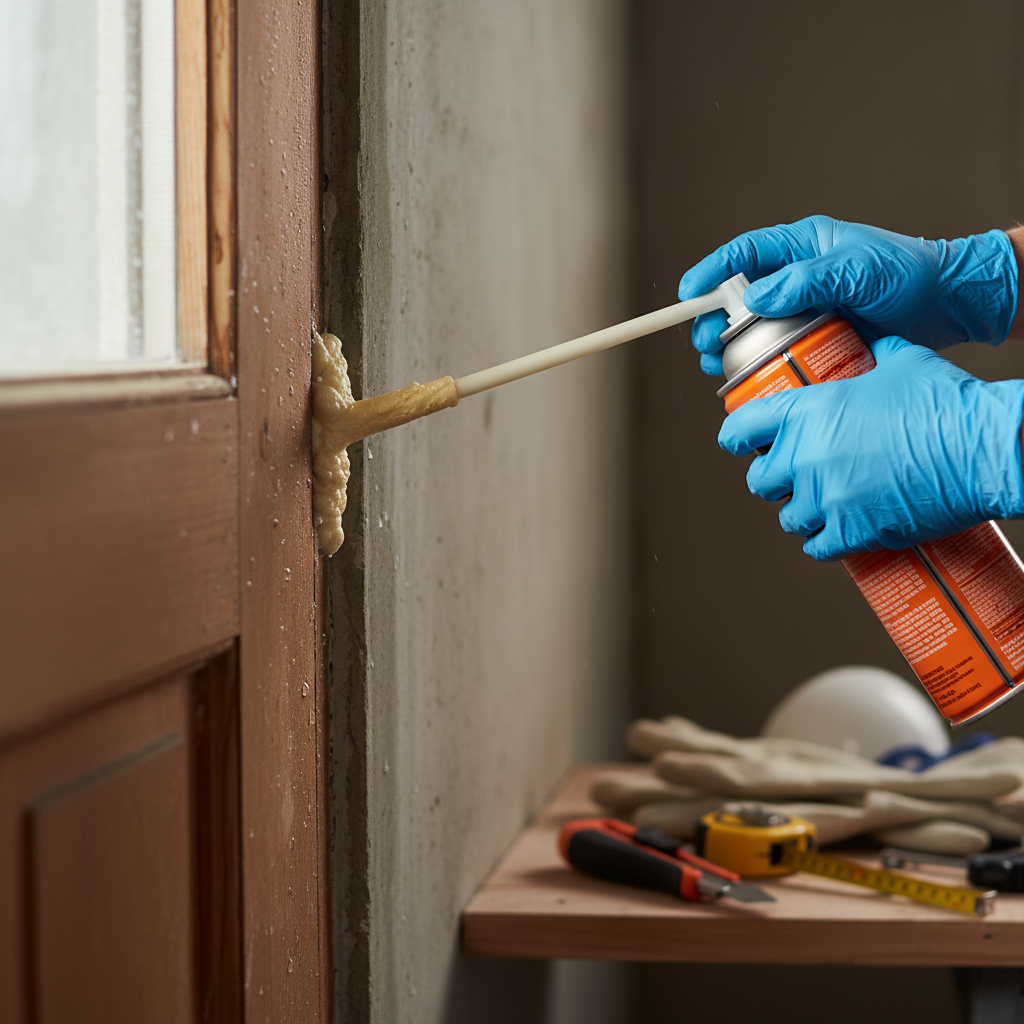
Introduction: The Magic of the Orange Can
In the world of home improvement and DIY maintenance, few tools are as satisfying or as effective as the humble can of spray foam sealant. Whether you are dealing with a drafty window, a gap around a plumbing pipe under the sink, or a mysterious breeze coming from your electrical outlets, spray foam is often the "magic bullet" solution. It is a versatile, expandable material that fills voids, stops air leaks, and provides a level of insulation that traditional fiberglass batts simply cannot match in tight spaces.
However, despite its accessibility, spray foam is notorious for being messy. If you have ever seen a DIY project gone wrong, you might have seen "foam mushrooms" exploding out of walls or sticky residue ruined on a finished floor. Using spray foam cans for small gap sealing requires a blend of science, technique, and patience. In this comprehensive 3,000-word guide, we will walk you through everything you need to know—from choosing the right type of foam to the advanced techniques that ensure a professional, clean finish every time.
Understanding Spray Foam: What Is It and How Does It Work?
Before we dive into the "how-to," it is crucial to understand what is happening inside that pressurized can. Most consumer-grade spray foam (like Great Stuff or Loctite) is a one-component polyurethane foam. It exists as a liquid polymer inside the can, mixed with a propellant.
When you pull the trigger, the pressure forces the liquid out through the straw. As soon as the liquid hits the air, it reacts with the moisture (humidity) in the environment. This chemical reaction causes the liquid to expand rapidly—sometimes up to three times its original volume—and then harden into a rigid or semi-rigid plastic structure. This expansion is what makes it so effective at sealing gaps, but it is also what makes it difficult for beginners to control.
The Three Main Types of Spray Foam Cans
Not all spray foam is created equal. Using the wrong type for a specific job can lead to structural damage or a failed seal. Here are the three categories you will find at the hardware store:
- Gaps & Cracks (High Expansion): This is the standard foam. It expands significantly and becomes quite rigid. It is best for large voids in attics, basements, or rim joists.
- Window & Door (Low Expansion/Low Pressure): This is arguably the most important type for small gap sealing. It is formulated to expand with less force, ensuring that it doesn't bow window frames or door jambs, which would prevent them from opening or closing properly.
- Fireblock: Usually tinted orange, this foam is designed to impede the spread of fire and smoke through hidden channels in a home’s structure. It is required by many building codes when sealing gaps between floors or around electrical penetrations.
Step 1: Preparation and Safety—The Most Important Phase
If you skip preparation with spray foam, you will regret it. Spray foam is incredibly adhesive; once it gets on your skin, hair, or clothing, it is nearly impossible to remove without harsh chemicals or waiting for your skin cells to naturally shed over several days.
Personal Protective Equipment (PPE)
Before you even shake the can, suit up with the following:
- Gloves: Nitrile or latex gloves are mandatory. Disposable ones are best because you will likely throw them away afterward.
- Eye Protection: A stray drop of foam in the eye is a medical emergency. Wear safety goggles.
- Long Sleeves: Protect your arms. Wear old clothes that you don’t mind throwing away.
- Ventilation: While small gap sealing doesn't produce a massive amount of fumes, it is always best to have a window open or a fan running.
Site Preparation
Identify the gaps you want to seal. Common areas include around dryer vents, outdoor faucets, cable entries, and baseboards. Once identified, follow these steps:
Clean the Area: Use a vacuum or a stiff brush to remove dust, cobwebs, and loose debris. Foam sticks best to clean surfaces. If the area is oily, wipe it down with a degreaser.
Protect Surrounding Surfaces: Use painter's tape and plastic sheeting or drop cloths to cover floors and walls near the gap. Even a small drip can leave a permanent stain on a hardwood floor or carpet.
The Secret Weapon: The Spray Bottle: Polyurethane foam needs moisture to cure. If you are working in a very dry environment (like a heated home in winter), the foam might take a long time to harden or could collapse. Lightly misting the gap with water from a spray bottle before application will accelerate the curing process and improve the foam's structure.
Step 2: Mastering the Technique
Now that you are prepared, it’s time to apply the foam. This is where most people make the mistake of over-applying.
Shaking the Can
The chemicals inside the can need to be thoroughly mixed. Shake the can vigorously for at least 60 seconds. You should continue to shake it occasionally during the application process to keep the propellant and polymer integrated.
The Upside-Down Rule
Almost all consumer spray foam cans must be held upside down to work. The straw should be pointing toward the ground, and the bottom of the can should be pointing toward the ceiling. If you hold the can upright, you will only release the propellant gas, leaving the heavy liquid foam trapped inside, effectively ruining the can.
The 40% Filling Rule
This is the golden rule of small gap sealing: Only fill the gap about 40% to 50% of the way.
Because the foam expands so much, a gap that looks half-empty will be overflowing within ten minutes. By leaving room for expansion, you prevent the foam from spilling out onto your finished surfaces, saving you hours of cleanup and trimming later.
Controlling the Flow
Practice your trigger squeeze on a piece of cardboard first. Most cans have a variable trigger—the harder you squeeze, the faster the foam comes out. For small gaps, you want a slow, steady bead. Move the straw at a consistent speed along the length of the gap.
Step 3: Handling Common Small Gap Scenarios
Different gaps require different approaches. Let’s look at how to handle the most common small-scale sealing tasks.
Sealing Around Plumbing Pipes
Gaps around pipes under sinks or behind toilets are major highways for mice and drafts.
- Insert the straw into the gap as far as it will go.
- Apply a bead around the circumference of the pipe.
- If the hole is large, apply the foam in layers. Let the first layer "tack up" for 15 minutes before adding more.
Sealing Electrical Outlets (Draft Proofing)
Warning: Never spray foam directly into an electrical box or onto exposed wiring. To seal drafts behind outlets:
- Turn off the power at the breaker.
- Remove the plastic faceplate.
- Look for the gap between the edge of the electrical box and the drywall.
- Use a "Low Expansion" foam to fill that tiny perimeter gap.
- Wait for it to cure completely before replacing the faceplate.
Exterior Foundation Cracks
Small cracks in the foundation can let in radon gas and moisture.
- Ensure the crack is dry.
- Deep cracks should be filled with a foam backer rod first, then sealed with spray foam on the surface.
- Once cured, exterior foam must be painted or covered. UV rays from the sun will break down spray foam, turning it brittle and orange-brown within a few months.
Step 4: Curing and The Waiting Game
Once the foam is applied, leave it alone. One of the biggest mistakes DIYers make is trying to "smush" or "shape" the foam while it is still wet. This only creates a sticky mess and destroys the foam's insulating properties by collapsing the air bubbles.
Tack-Free Time: Usually 10 to 20 minutes. At this stage, the surface is no longer sticky, but the inside is still liquid.
Trimmable Time: Usually 1 hour. The foam is firm enough to be cut with a blade.
Full Cure: 8 to 24 hours. The foam has reached its maximum strength and stability.
Step 5: Trimming and Finishing
After the foam has cured for at least an hour, you can remove the excess. If you followed the "40% rule," you should have very little excess to deal with. However, if the foam has mushroomed out of the gap, follow these steps:
The Cutting Process
Use a sharp utility knife or a serrated bread knife. A dull blade will tear the foam rather than cutting it, leaving a jagged, ugly surface. Hold the blade flush against the wall or the pipe and use a sawing motion to slice off the excess foam. The goal is to make the foam level with the surrounding surface.
Sanding and Painting
Cured foam can be sanded with medium-grit sandpaper to achieve a smoother finish. However, keep in mind that the interior of the foam has a "cell" structure that looks a bit like a sponge. If you want a perfectly smooth look, you may need to apply a thin layer of spackle or caulk over the trimmed foam before painting.
Step 6: Cleaning Up and Storage
What do you do with a half-used can of spray foam? In the past, the answer was usually "throw it away," because the foam would harden inside the straw and clog the valve. However, with modern cans and a few tricks, you can save the remainder for later.
Cleaning the Straw
If you plan to use the can again within a few days, do not remove the straw. Leave the bead of foam hanging out of the end of the straw. It will harden and create an airtight seal, protecting the liquid foam inside the can. When you are ready to use it again, simply snip off the end of the straw or pull out the "plug" of hardened foam with a screw.
Using Acetone
If you get wet foam on a surface you didn't mean to, acetone (or nail polish remover) is the only thing that will dissolve it. However, acetone can also damage paint and plastics, so test it in an inconspicuous area first. Once the foam has dried, acetone will no longer work; you will have to use mechanical means (scraping or sanding) to remove it.
Advanced Tips for Professional Results
To truly master small gap sealing, consider these professional-grade tips:
1. Temperature Matters
Spray foam performs best when both the can and the surface are between 65°F and 80°F (18°C - 27°C). If the can is too cold, the foam will be thick and won't expand properly. If it’s too hot, it may expand too aggressively. If you're working in a cold garage, let the can sit inside the house for a few hours to reach room temperature.
2. Avoid "The Void"
When sealing deep gaps, don't try to fill the whole thing in one pass. Large masses of foam can trap unreacted chemicals in the center, which may stay liquid for a long time or fail to provide a good seal. Build the foam up in 1-inch layers, misting with water between each layer.
3. The "Straw Extension" Trick
If you need to reach a gap that is deep inside a wall or in a very tight corner, you can extend the plastic straw by taping a piece of flexible vinyl tubing to the end. Just be aware that the foam will expand inside this tube, and you will likely have to discard the tubing after one use.
Common Mistakes to Avoid
Even with a guide, it’s easy to slip up. Watch out for these common pitfalls:
- Overfilling: We cannot stress this enough. Less is more. You can always add more foam, but removing excess is a chore.
- Spraying Near Pilot Lights: Spray foam propellant is often flammable. Never use it near a water heater, furnace, or stove with an active pilot light until the foam has fully cured and the area is ventilated.
- Using High-Expansion Foam on Windows: A standard "Gaps & Cracks" foam can exert enough pressure to warp a vinyl window frame, making it impossible to slide the window up and down. Always use the "Window & Door" specific product.
- Touching Wet Foam: It is tempting to try and poke the foam to see if it’s hard. Don't. You will end up with a sticky mess on your finger and a permanent dent in your seal.
The Environmental and Financial Benefits
Why go through all this trouble for a few small gaps? The impact is larger than you might think.
Energy Efficiency
According to the Department of Energy, air leakage can account for up to 30% of a home's heating and cooling costs. Small gaps around pipes, wires, and vents act like tiny chimneys, sucking conditioned air out of your house and pulling raw outdoor air in. By spending $10 on a can of spray foam and an hour of your time, you could save hundreds of dollars over the lifespan of your HVAC system.
Pest Control
Mice can squeeze through a hole the size of a dime. Insects like ants and cockroaches use the gaps around plumbing and electrical lines as "highways" to move between walls and into your kitchen. Spray foam isn't a food source for pests, and while a determined rodent can chew through it, they are much less likely to try if they can't smell the food or feel the warmth coming from the hole.
Moisture Protection
Air leaks often carry moisture. In the winter, warm, moist indoor air can be pushed into cold wall cavities, where it condenses into water. This leads to mold, mildew, and wood rot. Sealing these gaps creates a vapor barrier that protects the structural integrity of your home.
Comparison: Spray Foam vs. Caulk
When should you use spray foam instead of traditional caulk?
- Use Caulk: For very thin gaps (less than 1/4 inch), for joints that require a very smooth aesthetic finish (like where a countertop meets a backsplash), or for joints that need to remain flexible.
- Use Spray Foam: For larger gaps (1/4 inch to 3 inches), for irregular shapes, for areas where insulation value (R-value) is important, and for filling deep voids.
Troubleshooting Common Issues
The Foam is Falling Out of the Gap
If you are spraying overhead and the foam falls out, you are likely applying too much at once. Try applying a thin "tack coat," letting it dry for 10 minutes, and then applying the rest of the foam. The first layer will act as an anchor.
The Foam is Discoloring
If your foam turns brown and starts to crumble, it is being degraded by UV light. This happens on exterior applications. To fix this, scrape away the damaged foam and apply a fresh bead. Once cured, cover it with a coat of outdoor-grade paint or a layer of silicone caulk.
The Can Stopped Working
If there is still liquid in the can but nothing comes out, the valve is likely clogged. You can sometimes clear this by cleaning the valve with a toothpick and some acetone, but often, the can is a loss. This is why it is important to finish your foaming tasks in one session if possible.
Conclusion: Small Gaps, Big Impact
Mastering the use of spray foam cans is a rite of passage for any homeowner or DIY enthusiast. It is a skill that combines mechanical precision with a bit of "feel" for how the material behaves. While it may seem daunting at first—given the potential for mess—following the steps outlined in this guide will ensure that your small gap sealing projects are successful, clean, and durable.
Remember the essentials: Prepare your area, Protect yourself, Shake the can, Invert it, and Underfill the gap. By taking these precautions, you turn a potentially messy job into a professional-grade home improvement. Your home will be warmer, your energy bills will be lower, and you’ll have the satisfaction of knowing that those pesky drafts and unwanted pests are finally locked out.
So, the next time you feel a chill or spot a gap behind your kitchen sink, don't reach for a rag to stuff in the hole. Reach for the orange can, follow this guide, and seal it like a pro.